

Clean a DVD by removing loose dust first, then wiping in straight lines from the center hole to the outer edge with a soft microfiber cloth lightly dampened with distilled water. Never scrub in circles, never use paper towels, and never spray liquid directly onto the disc. If the disc still skips, use a tiny amount of mild dish soap or 70% isopropyl alcohol on the cloth, then dry it with the same center-to-edge motion.
TLDR: Start with the gentlest method: blow away dust, wipe with microfiber, and use distilled water only if needed. For example, if a movie freezes at the 42-minute mark, one fingerprint near the outer half of the disc may be enough to cause read errors. In many cases, a 60-second clean fixes smudges without making scratches worse. Deep scratches that catch your fingernail usually need resurfacing, not more rubbing.
Contents
- 1 Why DVDs Need Gentle Cleaning
- 2 What You Need Before You Start
- 3 Step 1: Hold the DVD Correctly
- 4 Step 2: Inspect the Disc Under Good Light
- 5 Step 3: Remove Loose Dust First
- 6 Step 4: Wipe from the Center to the Edge
- 7 Step 5: Use Distilled Water for Fingerprints
- 8 Step 6: Use Mild Soap for Sticky Spots
- 9 Step 7: Use Isopropyl Alcohol Only When Needed
- 10 What Not to Do
- 11 How to Tell If Cleaning Worked
- 12 What If the DVD Is Still Skipping?
- 13 How to Keep DVDs Clean Longer
Why DVDs Need Gentle Cleaning
A DVD looks tough, but the readable surface is easy to scuff. Tiny scratches scatter the laser inside your player, and greasy fingerprints bend light just enough to cause skips, freezing, or loading errors. The annoying part is that a dirty disc and a damaged disc can behave the same way.
That is why you should clean first and polish later, if at all. A rushed wipe with a shirt can turn a simple smudge into a permanent scratch. It drives me crazy that one careless five-second wipe can create a problem that takes far longer to fix.
The safest cleaning rule is simple: less pressure, fewer chemicals, straighter strokes.
What You Need Before You Start
Set up a clean, well-lit space. A kitchen table works fine if it is dry and free of crumbs. Avoid cleaning a disc over carpet, sinks, or rough counters.
- Microfiber cloth: Use a clean, lint-free cloth made for lenses or screens.
- Distilled water: Better than tap water because it leaves fewer mineral spots.
- Mild dish soap: Use only a tiny drop for sticky grime.
- 70% isopropyl alcohol: Optional, useful for oily fingerprints. Use sparingly.
- Air blower: A camera lens blower is ideal for removing loose dust.
- Soft towel: Place it under the disc if you need a padded surface.
Avoid paper towels, tissues, napkins, toilet paper, rough fabric, window cleaner, acetone, bleach, furniture polish, and abrasive pastes. These can scratch, haze, or chemically damage the plastic surface.
Step 1: Hold the DVD Correctly
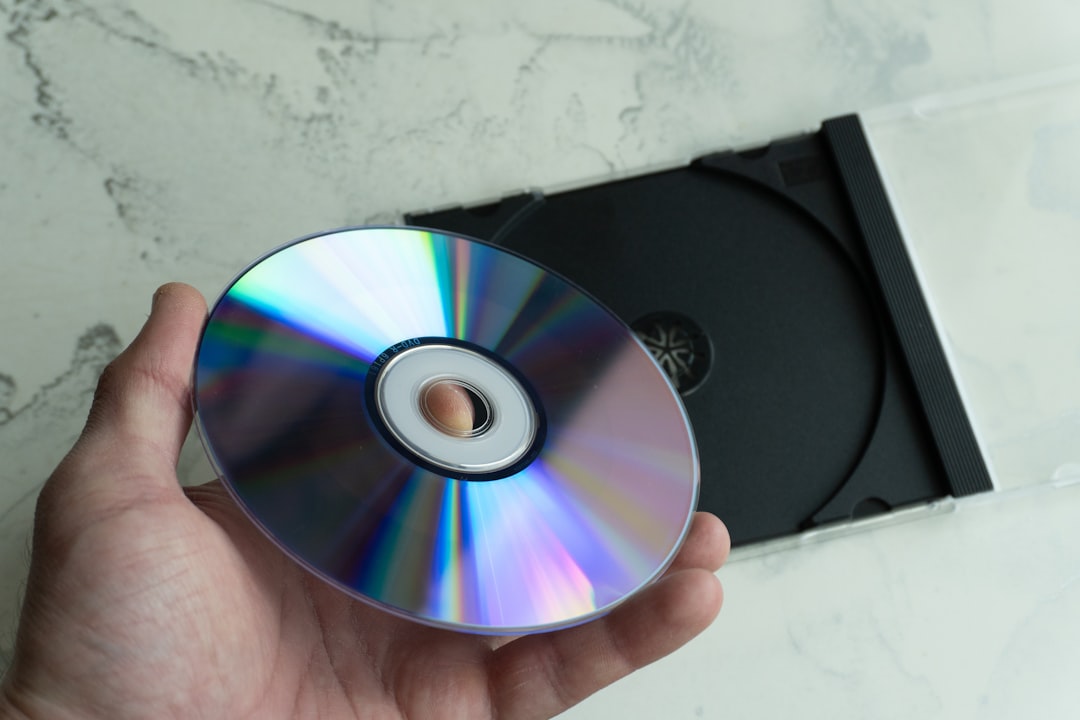
Pick up the DVD by the outer edge and the center hole. Do not press your fingers onto the shiny side. Skin oil is one of the most common causes of playback trouble.
If you need to set the disc down, place it label-side down on a clean microfiber cloth. Do not slide it across the table. Sliding can drag grit across the surface, which is exactly what you are trying to avoid.
Step 2: Inspect the Disc Under Good Light
Tilt the DVD near a lamp or window. Look for dust, fingerprints, cloudy patches, food spots, and scratches. This quick check helps you choose the right cleaning method.
Smudges often look cloudy or rainbow-like. Scratches appear as thin lines. A scratch that runs from the center outward is usually less harmful than a circular scratch that follows the path of the data track. That is why circular wiping is such a bad habit.
If a scratch catches your fingernail, cleaning will not remove it. You can still clean the disc, but do not expect a miracle.
Step 3: Remove Loose Dust First
Before using any cloth, remove loose particles. Use a hand air blower or gently puff air across the disc. Do not use compressed air at close range unless it is made for electronics and does not spray liquid propellant.
This step may feel minor, but it matters. Dust can act like sandpaper under a cloth. Expect to waste time on repeat cleaning if you skip it, especially with discs that have been sitting in an open case for years.
Step 4: Wipe from the Center to the Edge
Use a dry microfiber cloth first. Place the cloth near the center hole and wipe straight outward to the edge. Lift the cloth, return to the center, and repeat in a new section.
Do not wipe around the disc in circles. Circular marks can follow the same path the laser reads, which may cause more playback issues. Straight center-to-edge marks are less likely to confuse the player.
Use very light pressure. If you need to press hard, stop and switch to a damp method instead.
Step 5: Use Distilled Water for Fingerprints
If the dry cloth does not remove the smudge, dampen one corner of the microfiber cloth with distilled water. The cloth should be slightly damp, not dripping. Never spray water directly onto the DVD.
Wipe from the center outward, section by section. Then use a dry part of the cloth to remove moisture using the same straight motion. Let the disc air dry for a few minutes before playing it.
Water trapped near the center ring or outer edge can cause streaks. So take an extra moment to dry those areas.
Step 6: Use Mild Soap for Sticky Spots
Sticky residue needs more than water. Mix one drop of mild dish soap into a small bowl of distilled water. Dip a corner of the microfiber cloth into the mixture, then wring it out until it is only damp.
- Wipe the dirty area from center to edge.
- Use a second cloth dampened with plain distilled water to remove soap.
- Dry with a clean microfiber cloth.
- Wait until the surface is fully dry before inserting the disc into a player.
Do not soak the disc. DVDs are sealed, but liquid can still creep into tiny edge defects, cracks, or old manufacturing flaws.
Step 7: Use Isopropyl Alcohol Only When Needed
For heavy fingerprints, 70% isopropyl alcohol can help. Put a small amount on the cloth, not the disc. Wipe straight outward and dry right away.
Do not use stronger solvents. Acetone, paint thinner, gasoline, and household cleaners can cloud or soften the plastic. Some “all-purpose” sprays also contain additives that leave a film. That film may make the disc look clean while still causing read errors.
What Not to Do
Many damaged DVDs are not ruined by age. They are ruined by bad cleaning. Avoid these common mistakes:
- Do not use paper towels. They feel soft, but the fibers can scratch plastic.
- Do not polish in circles. This can create track-following scratches.
- Do not use toothpaste unless you accept the risk. It is abrasive and can make hazing worse.
- Do not scrub labels. Labels can chip, peel, or trap moisture near the edge.
- Do not put DVDs in dishwashers. Heat, detergent, and water pressure can destroy them.
- Do not use a dirty cloth. A microfiber cloth with grit is worse than no cloth at all.

How to Tell If Cleaning Worked
After the disc is dry, test it in the DVD player or computer drive. If it loads faster and skips less, the issue was likely dirt or oil. If the same scene still freezes, inspect that area of the disc again.
A single visible scratch does not always match the problem spot because DVDs store data in a spiral path. Still, heavy damage near the outer portion can affect later parts of a movie. That is why a film may play fine for an hour, then suddenly freeze.
What If the DVD Is Still Skipping?
If cleaning does not help, the surface may need resurfacing. A disc resurfacing machine removes a tiny layer of plastic and smooths scratches. Many game shops, libraries, and media repair services offer this for a small fee.
Only resurface a disc if it is worth saving. Home repair kits can work, but they vary a lot. Cheap pads and hand cranks sometimes leave swirl marks. If the DVD is rare, sentimental, or out of print, use a professional service.
How to Keep DVDs Clean Longer
Prevention is easier than repair. Put discs back in their cases right after use. Keep them away from heat, direct sun, greasy hands, and dusty shelves. Store them upright, like books, rather than stacked under pressure.
Clean your DVD player tray too. A dusty tray can put particles back onto a freshly cleaned disc. Use a soft dry cloth for the tray and keep liquids away from the player.
The best method is boring, but it works: handle the disc by the edges, remove dust first, wipe straight outward, and use the mildest cleaner that solves the problem. Your DVD gets a better chance to play, and you avoid turning a small smudge into lasting surface damage.

